
If you love Oreos, white chocolate, and that perfect chewy-yet-crispy bakery-style cookie, you’re about to find your new obsession.
I’ve made a lot of cookies in my life. Like, a lot. Chewy ones, crispy ones, cakey ones, even some that turned into sad little pucks because I forgot the baking powder (don’t judge me). But this cookies and cream cookies recipe? It’s different. It’s the kind of cookie that makes you close your eyes when you take the first bite.
I stumbled across this recipe while deep-diving YouTube baking videos at 11 PM — you know the drill. Cupcake Jemma from the legendary Crumbs & Doilies bakery in London’s SoHo had just posted a video, and within the first ten seconds, I was hooked. She mentioned that their Cookies & Cream New York Cookies were selling out almost every single day. And when a professional baker says something is flying off the shelves, I listen.

So I tried it. Then I tweaked it. Then I made it again. And again. (My family is not complaining.)
Now I’m sharing my honest, home-kitchen-tested version of this incredible recipe with you — including all the little tips and tricks I learned along the way so you don’t make the same mistakes I did.
Recipe Video by Cupcake Jemma
All credit for the original recipe goes to the wonderful Cupcake Jemma and the team at Crumbs & Doilies Bakery in London. Watch their original video below to see exactly how they make these beauties in their professional kitchen.
What Makes These Cookies & Cream Cookies So Special?
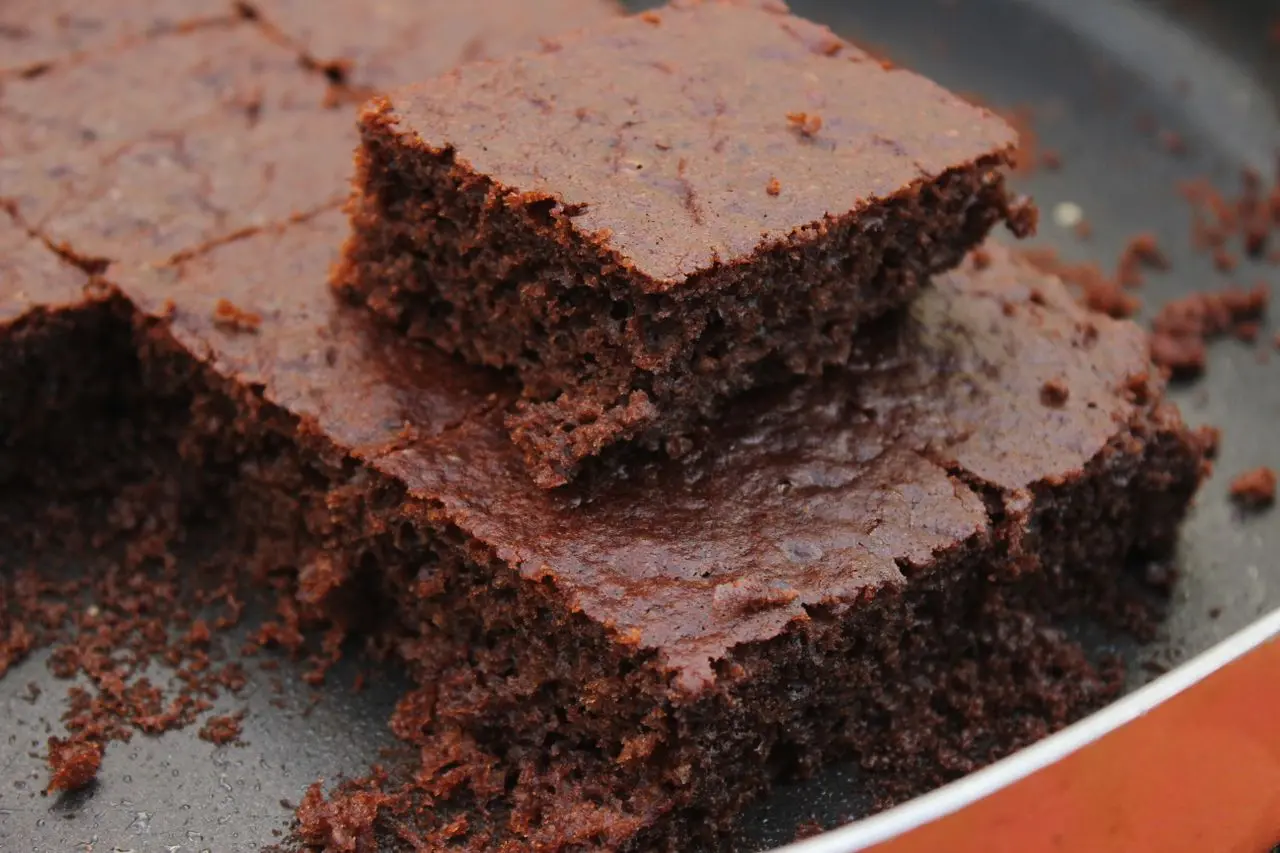
Let me paint you a picture. Imagine a dark, rich double chocolate cookie with a craggy, crunchy exterior. Now imagine biting into it and discovering pools of molten white chocolate, crunchy Oreo bits, and a soft, almost underbaked center that melts on your tongue. That’s what we’re making today.
Unlike regular chocolate chip cookies, these cookies and cream cookies recipe uses black cocoa powder (the same stuff Oreos are made with) and a genius hidden filling: frozen blobs of white chocolate spread. When they bake, that filling turns into a gooey, creamy surprise in the middle.
The texture? Thick, chunky, and beautifully uneven — exactly how a New York-style bakery cookie should look. None of those perfectly round, uniform pucks here.
Ingredients for These Cookies and Cream Cookies Recipe
Here’s everything you’ll need. I’ve added my personal notes and substitutions where I think they’re helpful.
Makes 12 large bakery-style cookies
For the Cookie Dough:

For the Filling & Coating:
My Recommended Tools
To get the best results with this cookies and cream cookies recipe, a few tools make a huge difference. These are the exact ones I use in my kitchen:
- Digital Kitchen Scale – Essential for accuracy when measuring 125g dough balls. Check price here
- Cookie Scoop (large) – Makes portioning consistent and mess-free. Check price here
- Black Cocoa Powder – Hard to find in regular stores, but worth ordering online for that authentic Oreo flavor. Check price here
Step-by-Step Instructions (My Home Kitchen Version)
Step 1: Prepare the White Chocolate Filling
This step is non-negotiable. The frozen filling is what makes these cookies and cream cookies so special.
Scoop about 12 blobs of white chocolate spread — roughly a heaped teaspoon or just under a tablespoon each. Place them on a small tray lined with parchment paper and freeze for at least 30 minutes, preferably an hour. They need to be rock solid before you assemble the cookies.
I actually freeze mine overnight. The harder they are, the easier they are to wrap the dough around.
Step 2: Mix the Dry Ingredients
In a large bowl, whisk together:
Set this aside. Having your dry mix ready before you start the wet ingredients prevents over-mixing later, which is crucial for that craggy texture.
Step 3: Prepare the Eggs
In a small bowl, lightly whisk 2 whole eggs plus 1 extra yolk. Just break them up with a fork — no need to get aggressive. Set aside.
Step 4: Make the Cookie Base
In a stand mixer fitted with the paddle attachment (or a large bowl with a hand mixer), combine your cold, chopped butter with both sugars. Mix on low speed until the mixture looks like “chunky rubble” — about 1-2 minutes. Don’t try to cream it until smooth. Chunky rubble is exactly what you want.
On my first attempt, I let the mixer run too long and ended up with a smooth, greasy dough. The cookies came out flat and sad. Trust the rubble.
Step 5: Add the Chips and Oreo Crumbs
Add your white chocolate chips, dark chocolate chips, and 50g of crushed Oreo crumbs (without the cream). Mix on low until just combined. The mixture should still look rubbly and sandy.

Step 6: Add the Dry Ingredients
Pour in your pre-mixed dry ingredients and mix on low until the texture becomes sandy — like wet sand at the beach. You’ll still see chunks of butter and chocolate, and that’s perfect. Don’t overmix.
Step 7: Add the Eggs
Pour in your whisked eggs and mix on low just until everything comes together. The dough will look clumpy and uneven. Again, don’t overmix. Overmixing = tough cookies.
Related Post

Step 8: Portion the Dough (125g Each)
This is where a kitchen scale becomes your best friend. For an authentic New York bakery size, weigh each dough ball to 125 grams.
Here’s the technique: scoop the dough, then barely squeeze it together. Don’t roll it into a smooth ball! You want it craggy and lumpy. That uneven surface creates those beautiful crispy edges.
Step 9: Add the Frozen Filling
Take your 125g dough clump and poke your thumb right into the center to create a little pocket. Grab one frozen white chocolate spread blob from the freezer and press it into the hole. Then gently close the dough around it, squeezing the edges to seal. Again — don’t roll it smooth.
Step 10: Roll in Extra Oreo Crumbs
Pour the remaining 50g of crushed Oreo cookies onto a plate. Gently press each filled dough ball into the crumbs, coating the outside. Don’t worry if it doesn’t stick perfectly everywhere — it’ll still bake beautifully.
Step 11: Freeze the Dough Balls (Crucial Step!)
Place all 12 cookie dough balls on a tray lined with parchment paper. Freeze for a minimum of 4 hours, preferably overnight. I cannot stress this enough. The dough needs to be rock solid before baking. This prevents spreading and gives you that thick, chunky center.
Step 12: Bake
Preheat your oven to 190°C (375°F) fan-assisted (or 200°C/400°F for conventional).
Place the frozen dough balls on a baking sheet lined with parchment paper — leave plenty of space between them (at least 5-7 cm) because they will spread.
Bake for exactly 16 minutes. Don’t open the oven door during baking. Trust the process.
Step 13: Cool (Be Patient!)
When you pull them out, the cookies will look puffy and feel soft in the center. Do not try to move them. They need to cool on the baking sheet for at least 10-15 minutes to set properly. If you try to lift them while they’re warm, they will fall apart.
After 15 minutes, transfer to a wire rack to cool completely — if you can wait that long. I usually crack one open while it’s still warm and slightly molten inside.

My Honest Opinion After Making This Recipe 7 Times
Texture: 10/10. The contrast between the crispy, craggy exterior and the soft, gooey, almost-underbaked center is exactly what I want in a cookie. The frozen white chocolate filling creates little pockets of creamy sweetness that melt in your mouth.
Flavor: Rich, deep chocolate from the black cocoa, balanced by sweet white chocolate chips and the familiar taste of Oreo crumbs. It’s sweet but not sickeningly so — the salt and dark chocolate chips help balance everything.
Difficulty: Honestly? It’s not hard, but it requires patience. The hardest part is waiting for the dough to freeze. Beginners can absolutely nail this as long as they follow the freezing instructions.
Would I make it again? Already have. Multiple times. This cookies and cream cookies recipe is now permanently in my rotation. I’ve made it for bake sales, family gatherings, and just because it was Tuesday. Every single time, people ask for the recipe.
One small critique: The white chocolate spread filling can be tricky to find. I’ve used Nutella (hazelnut) and cookie butter as substitutes with great results. White chocolate bars chopped into small squares also work, though the texture is slightly less creamy.

My Best Tips & Tricks for Perfect Cookies & Cream Cookies
1. Keep Everything Cold
This recipe is designed around cold ingredients. Cold butter, cold dough, frozen filling. If your kitchen is warm, work quickly and don’t let the dough sit out. I sometimes pop my mixing bowl in the fridge for 10 minutes between steps.
2. Don’t Skip the Black Cocoa
Regular cocoa powder works in a pinch, but black cocoa is what gives these cookies that authentic Oreo-like flavor. It’s more intensely chocolatey and less bitter. You can find it on Amazon or in specialty baking stores.
3. The “Craggy” Secret
That beautiful, uneven bakery look comes from not rolling the dough. Scoop, clump, press lightly — that’s it. The more you handle the dough, the smoother and rounder your cookies will be.
4. What If I Don’t Have White Chocolate Spread?
No problem. Here are three substitutes I’ve tested:
- Chopped white chocolate (about 1 square per cookie) — creates a firmer, more distinct pocket
- Nutella or cookie butter — completely different flavor but absolutely delicious
- Caramel squares — for a salted caramel version
5. Freeze for Longer Than You Think
4 hours is the minimum. I always freeze overnight. One time, I only froze them for 2 hours because I was impatient, and the cookies spread into flat, greasy discs. Don’t be like me.
Related Post

6. Storage & Make-Ahead
These dough balls freeze beautifully for up to 3 months. I make a double batch, freeze them on a tray, then transfer them to a freezer bag. Whenever I want fresh cookies, I bake straight from frozen — just add 1-2 minutes to the baking time.
Baked cookies stay fresh in an airtight container at room temperature for up to 5 days. (They won’t last that long, trust me.)
7. Reheating Tip
Microwave a cookie for 8-10 seconds to bring back that warm, gooey, fresh-from-the-oven texture. Absolute perfection with a glass of cold milk.
Evaluation
Frequently Asked Questions
I’m not exaggerating when I say this cookies and cream cookies recipe has become my go-to for every gathering, every bad day that needs a cookie, and every “I just want to impress someone” moment.
There’s something incredibly satisfying about pulling a tray of these craggy, chocolatey beasts out of the oven. The way your kitchen fills with that buttery, chocolatey, slightly toasty smell. The way the white chocolate filling oozes out when you break one open. The way people’s eyes widen when they take the first bite.
Yes, you have to wait for the dough to freeze. Yes, you need to track down black cocoa powder. But I promise you — every minute of waiting and every ingredient you hunt down is worth it.
Now I want to hear from you. Are you going to try this recipe? Do you have a favorite cookie memory or a substitution idea I haven’t thought of? Drop a comment below — I read every single one.
Cookies & Cream New York Cookies
INGREDIENTS
For the cookie dough
- 230 g Cold, chopped butter
- 160 g Light brown sugar
- 160 g Caster sugar
- 300 g Plain flour
- 130 g Self-raising flour
- 70 g Black cocoa powder
- 1 tsp Sea salt
- 2 tsp Baking powder
- 2 large Eggs
- 1 extra Egg yolk
- 300 g White chocolate chips
- 100 g Dark chocolate chips (54%)
- 50 g Crushed Oreo crumbs
For the filling & coating
- 12 tbsp White chocolate spread
- 50 g Crushed Oreo cookies (for rolling)
INSTRUCTIONS
- Scoop 12 blobs of white chocolate spread (about 1 tbsp each). Freeze on a parchment-lined tray for at least 30 minutes (preferably overnight).
- In a bowl, whisk together flour, self-raising flour, black cocoa, salt, and baking powder.
- In another bowl, lightly whisk 2 whole eggs + 1 yolk. Set aside.
- In a stand mixer, combine cold chopped butter, brown sugar, and caster sugar. Mix on low until chunky (1-2 min). Do not overmix.
- Add white chocolate chips, dark chocolate chips, and 50g crushed Oreo crumbs. Mix briefly.
- Add dry ingredients. Mix until texture is sandy (like wet sand).
- Add whisked eggs. Mix just until dough comes together. Do not overmix.
- Portion dough into 125g balls. Do not roll smooth – keep craggy.
- Press a frozen white chocolate blob into the center of each dough ball. Seal edges gently.
- Roll each filled dough ball in extra Oreo crumbs (50g).
- Freeze dough balls on a tray for at least 4 hours (ideally overnight).
- Preheat oven to 190°C (375°F) fan. Place frozen dough on baking sheet, spaced apart. Bake for 16 minutes. Do not open oven.
- Cool on baking sheet for 10-15 minutes before transferring to a wire rack.
NOTES
Recipe credit:
Recipe adapted from Cupcake Jemma at Crumbs & Doilies Bakery, London.
Thank you to Jemma and the entire team for sharing this incredible recipe with the world. If you’re ever in London, do yourself a favor and visit their shop at:
Crumbs & Doilies SoHo
1 Kingly Court, Carnaby
London W1B 5PW


Comment (1)
Ana
Excellent recipe!